
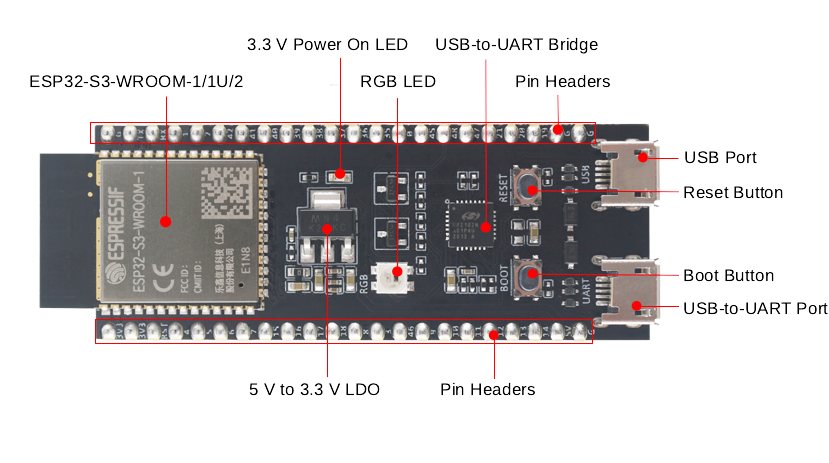
MicroPython lets you run Python code on a microcontroller such as the ESP32-S3. Flashing it onto your board gives you a direct way to experiment with hardware and scripts, instead of starting with an Arduino or C++ build workflow. By the end of this guide, your ESP32-S3 will be running MicroPython and you’ll be ready to run your first script.
Prerequisites
- An ESP32-S3 development board
- A data-capable USB cable—not a charge-only cable
- A computer with Python 3 installed
- About 15 minutes
1. Install esptool
esptool is the command-line utility used here to communicate with the ESP32-S3 bootloader and erase or write the board’s flash memory. Install it with pip:
pip install esptool2. Download the correct MicroPython firmware
Download the ESP32-S3 firmware from MicroPython’s ESP32-S3 download page. Board variants differ, including boards with or without PSRAM and boards using octal or quad flash. Check your board’s specification sheet before selecting a .bin file.
3. Put the board into bootloader mode
Bootloader, or download, mode is the state in which the ESP32-S3 is ready to receive new firmware. Most development boards enter this mode automatically when esptool connects. If yours does not, hold the BOOT button, tap RESET, and then release BOOT.
4. Erase the flash
Replace the port in this command with the port used by your computer. On Linux it may look like /dev/ttyUSB0; on Mac it may look like /dev/cu.usbmodemXXXX; on Windows it will look like COMx.
esptool.py --chip esp32s3 --port /dev/ttyUSB0 erase_flash5. Write the firmware
Replace /dev/ttyUSB0 with your board’s port and <firmware-file>.bin with the firmware file you downloaded. The baud setting controls the transfer speed used while writing the image.
esptool.py --chip esp32s3 --port /dev/ttyUSB0 --baud 460800 write_flash -z 0 <firmware-file>.bin6. Connect to the board and run code
After flashing finishes, connect to the board with either Thonny or mpremote.
Option A: Thonny IDE
In Thonny, set the interpreter to MicroPython (ESP32) and select the port for your board. You can then use Thonny to connect to the device and work with your MicroPython files.
Option B: mpremote
Install mpremote and connect to the board from a terminal:
pip install mpremote
mpremote connect /dev/ttyUSB0
Replace /dev/ttyUSB0 with your board’s port. Dropping a main.py file on the board makes it run automatically on boot. To execute a script ad hoc without saving it to the board, use:
mpremote run script.pyTroubleshooting
- The board is not detected: Try a different data-capable USB cable or USB port. You may also need CP210x or CH340 USB-serial drivers.
- “Failed to connect” errors: Hold the BOOT button while starting the erase or flash command.
- Permission denied on Linux: Add your user to the
dialoutgroup or usesudo.
Companion project
The companion project is available in the meow-micropython repository on GitHub. Use the repository for the project files and supporting code as it develops.
Next steps
Try a small first project, such as blinking the onboard LED. For further reading, see MicroPython’s official ESP32 quick reference.